

Infusible ink has finally arrived. To those unfamiliar, Cricut’s newest tech allows you to make really awesome looking t-shirts that don’t peel off. In the past to get this look you would need to do messy screen printing. Ok, I don’t actually know it’s messy but from what I’ve read it looks really messy and requires equipment that I don’t have. Infusible Ink has no dry time, is permanent and made with the Cricut you already have.
I followed the directions for Infusibleink.com. There are no directions inside the Infusible Ink boxes so you will need to follow the directions online. My boxes of ink transfer came with a sample fabric you to practice. I highly recommend using the demo fabric so you get the idea of the process.
Warning: there are some non-negotiables when using this product. Please read and understand their directions before going on your own adventure.
What you need.
- Cricut Maker or Cricut Explore cutting machine
(I have an Explore Air) - Standard Grip Machine mat
- Cricut EasyPress 2 or Cricut EasyPress (I have the older one)
- Cricut EasyPress Mat-
I used an ironing mat I doubled over from Walmart. ($4.85) - Infusible Ink Transfer Sheet ($12.99 for 2-12×12 sheets)
- Blank media that is cricut infusible ink compatible. ($9.99 t-shirt)
- Butcher paper
- Cardstock (80 lb.), White (colored cardstock not recommended)
- Lint roller
- Scissors
- Tweezers
- Design Space software on mobile device or computer- (free)
- Heat resistant tape (especially if your graphics include lettering)
- Cricut self healing mat (to line up lettering, you could probably use a quilting or other non-sticky craft mat)
When I first read the directions online I was confused by the word “blank”. It took me a bit to figure out that the word blank is referring to what you are putting the ink on. Apparently, there are only certain things it will bond with. Look for this symbol.
- Connect your Cricut.
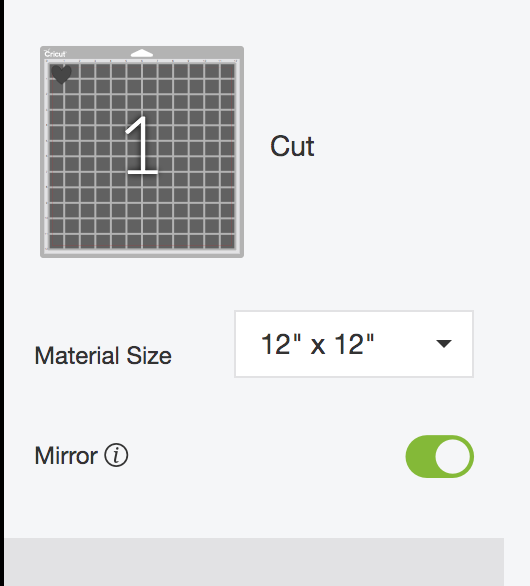
- Using Cricut Design Space pic out something to print. Click “Make It”, select mirror.
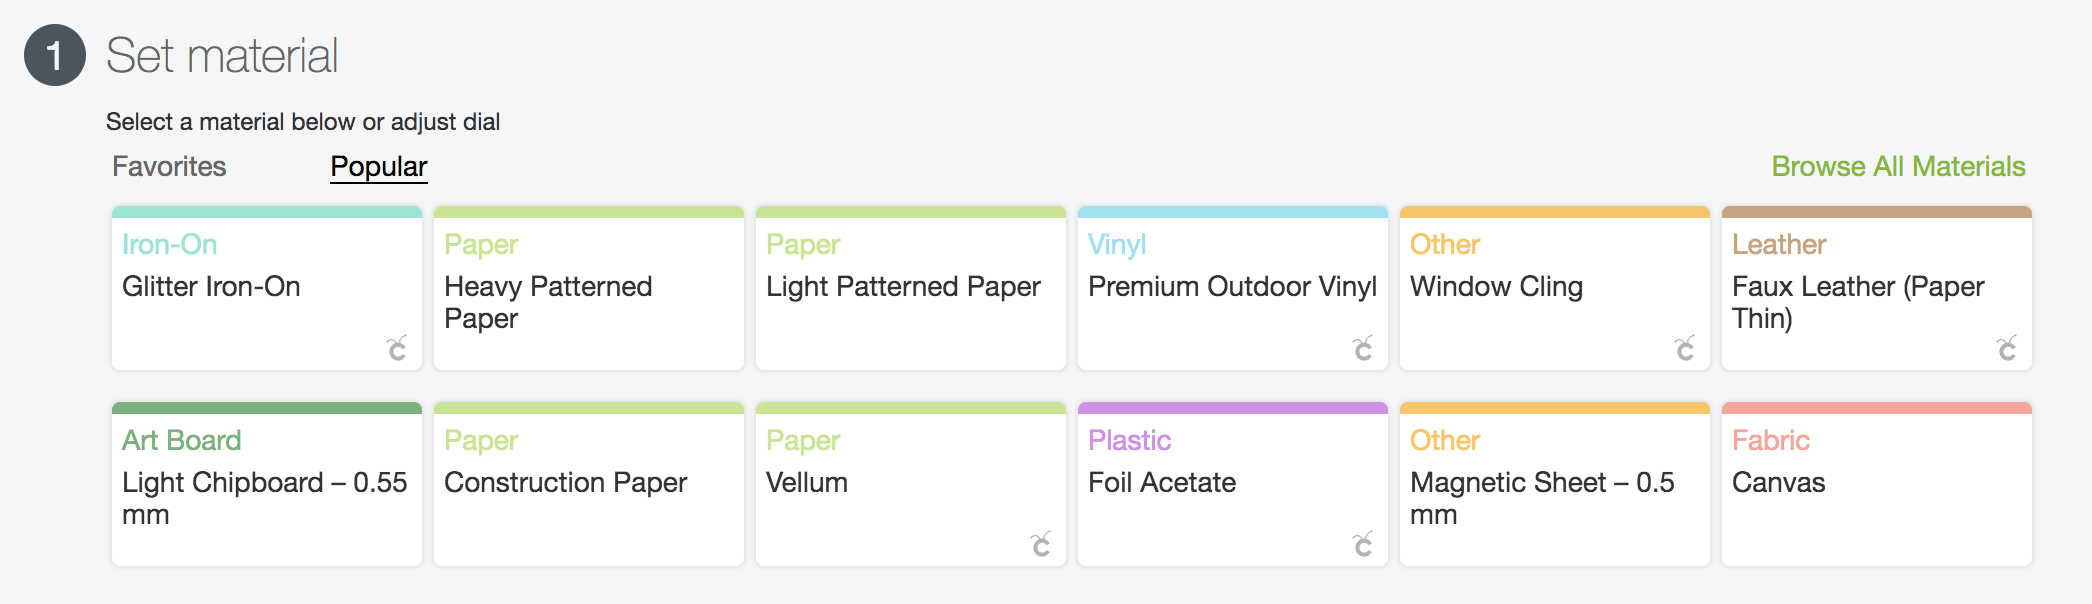
- Change your Material Setting to Infusible Ink- easier said than done on my older Explore Air. The dial doesn’t have that choice so I had to pause a minute and think. When I finally figured out that I needed to turn the dial to Custom I was rewarded with more choices within Cricut Design Space. Browsing “All” I found Infusible Ink. I marked it as a favorite.
- Press Go
- Remove your item from the sheet.
- Warm up your heat press. Oops, another pause while I see that my heat press only goes up to 360. Further reading tells me that 360 will be just fine.
- Go over your “blank” with a clean lint roller sheet to remove any teeny tiny things that Cricut says can mess stuff up.
- Make sure your “blank” doesn’t have any wrinkles by making a sandwich of your ironing mat, white cardstock and butcher paper. A note about the butcher paper- it needs to be bigger than your iron and Cricut warns against using it twice. (Not sure why, my guess is that at higher temperatures it will scorch)
- Iron at 385 for 15 seconds. For my older press, Cricut recommends 360 at 15 seconds which I noticed is no different from the “newer” press.
- Let your sandwich cool.
- Remove the butcher paper, and add the transfer image plastic square side up and recover with your butcher paper.
- Heat at 385 for 40 seconds or at 360 for 120 seconds. Apply light, even pressure and don’t move it. You are actually fusing the ink to the “blank”
- Let the new sandwich cool, remove the butcher paper and the transfer paper should just fall right off!
The Sample Results …

Very neat! As you stretch it you notice that it is indeed now part of the fabric. The design doesn’t feel any different from the cloth. I think I’m now ready to try one for real!
For Real This Time
The following is a play by play of my adventure making something that I will actually wear. Your adventure may vary.

As I looked to place my transfer sheet on the mat for my new project I noticed that there was a dark smudge. Like a hanging thread I just couldn’t resist trying to pick it off of the sheet. BAD IDEA. The ink is spread onto the transfer sheets and you’ll need to be a little more careful with how you handle them. I had managed to totally scrape the ink off of this sheet. It’s not a large spot but it’s irritating.
Here We Go!
Ok, I picked what I thought would be an easy one. I wanted to make a t-shirt with just text for my library. Enter Mistake # 2 (trying to remove the smudge was #1). Text was going to be hard but luckily I didn’t know I had exactly what I needed.
Rewind- I’ve got 10 minutes.
I need to back up a bit for you to appreciate what happened next.
I began my adventure at a local Michael’s where my husband, who was all too aware of my tendency to “get lost” in any craft store, gave be a 10 minute time limit in which to get in an out with what I needed and that he WOULD be leaving if I did not make it back out in time. Challenge accepted. I ran in and was pleased to notice that Michael’s had a large Infusion Ink display all trimmed with everything I was going to need. I reached for the long rectangular Cricut media boxes and grabbed two colors at $12.99 each. Looking further I found out that this new ink would only work on certain materials. No time to think about what that meant, tick tock, I grabbed two t-shirts ($9.99 each) both adorned with the official compatibility seal from Cricut. Rounding the display I grabbed a roll of heat resistant tape, $6.99. Lastly I picked up a Cricut self-healing mat for $12.99. Those last two items I wasn’t sure what they were for but they looked important and, although it was a gorgeous day, I didn’t really want to walk home which is what my future held if I took anymore time figuring this out. Purchase complete. (BTW- teacher discount does not apply to Cricut, ugh. )
Fast Forward-Dealing with Mistake #2.
Design is cut and I am immediately regretting the fact I didn’t precut my transfer piece to make removal easier. I gingerly cut off the extra from below my design and begin weeding the first word. Ahhh. Here is where I must have to use the heat tape! Thinking I’m smart I take the tape and place a strip over my first word to remove it from my cutting mat. Mistake #3. It occurred to me that the way I usually use transfer material was not going to work here. I was putting the tape on top of the ink, never going to work. As I try to peel off the tape from each letter I am reminded of Mistake #2 and try not to mess up the paint side of the letters. All the letters were now on my table and I was racking my brain with how my project was ever going to turn out straight. Ah Hah! The self-healing mat! It had just the grid I needed to line everything up. I would carefully line each letter along the mat grid lines and then quickly take another piece of transfer tape off the roll. “Success will be mine!” I tell myself as I attempt to lay the tape over the newly freed letters.
Enter Mistake #4. I soon found out that the tape gained a small static charge enough to pick up my letters from the table and make a terrible mess. After I again peeled the letters from the tape and arranged them all onto the self-healing mat, I grabbed a ruler to put across the top of the letters so I could securely tape the letters in order. Small detour.
I now have the letters and am ready to heat. I don’t have another piece of butcher block paper as I already wrecked one from the residue of a previous day’s project so I break a Cricut rule of never reusing butcher block paper. I throw caution to the wind and reuse a piece. Forgive me Cricut.
Cricut heat press, 360 for 120 seconds. No peeking, no moving.
Results- For Real

FANTASTIC! It worked! I can’t believe it. It looks a little yellow in the picture but the shirt is bright white. But, after all the putsy tape work, it worked! I know it is far from perfect, but aren’t we all?
Please let me know if you have had a chance to use this yet and if you figured out ways to make it easier.
